DocC: GitHub Actions Workflow
Maybe you already published a Swift library on GitHub and also generated some DocC documentation manually. But keeping it up to date can be hard and easy to forget. In this article I'll walk you through a setup to automatically build a new version of your documentation once your main branch is updated.
Preparing your Repository
First of all we you need to add the Swift-DocC Plugin to your Package.swift as a dependency:
dependencies: [
  .package(url: "https://github.com/apple/swift-docc-plugin", from: "1.0.0"),
]
Then add a .github/workflows directory to the root of your project. Inside this folder you will create the actual workflow to build the documentation automatically.
Creating the Workflow
Inside the workflows folder create a new file named build-documentation.yml.
name: build-documentation
on:
  push:
    branches:
      - 'main'
jobs:
  build-docc:
    runs-on: macos-12
    steps:
      - name: Checkout repository
        uses: actions/checkout@v1
      - uses: fwcd/[email protected]
        with:
          target: TARGET_NAME
          output: ./docs
          hosting-base-path: REPO_NAME
          disable-indexing: 'true'
          transform-for-static-hosting: 'true'
      - name: Init new repo in dist folder and commit generated files
        run: |
          cd docs
          git init
          git add -A
          git config --local user.email "[email protected]"
          git config --local user.name "GitHub Action"
          git commit -m 'deploy'

      - name: Force push to destination branch
        uses: ad-m/[email protected]
        with:
          github_token: ${{ secrets.GITHUB_TOKEN }}
          branch: docs
          force: true
          directory: ./docs
This basically sets up a workflow which will run once pushes happen on your main branch. It will use a macos-12 runner and run the following actions:
- checkout the repository
- build the documentation:
- target: The name of your target
- output: A folder where the documentation will be saved to.
- hosting-base-path: The name of your repository
- create a commit using a
GitHub Actionuser - push the commit to the
docsbranch
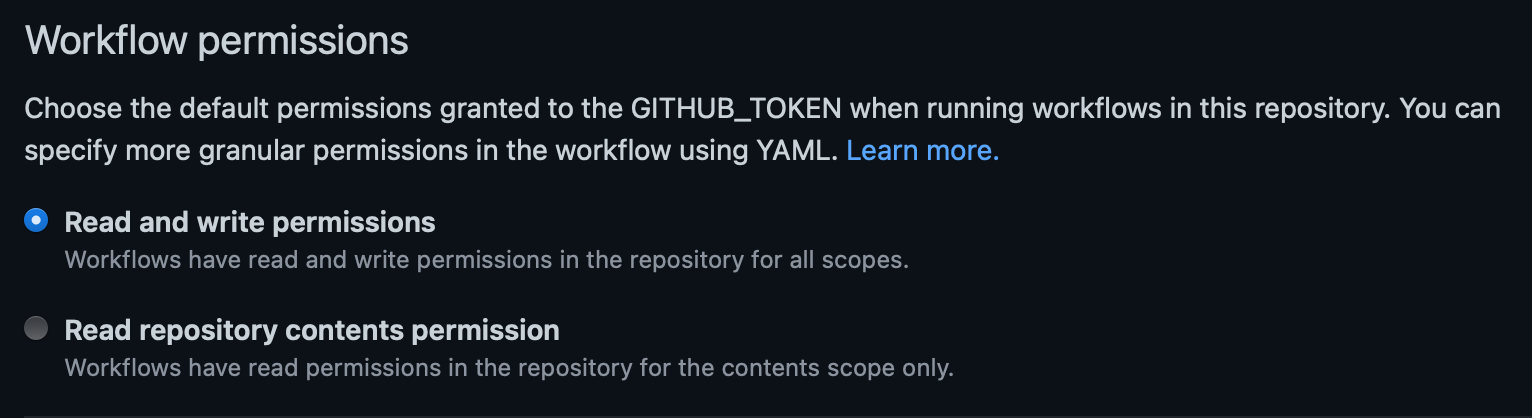
Make sure you enable
Read and write permissionsin your repository's settings inside theActions > Generaltab.
Run the Workflow
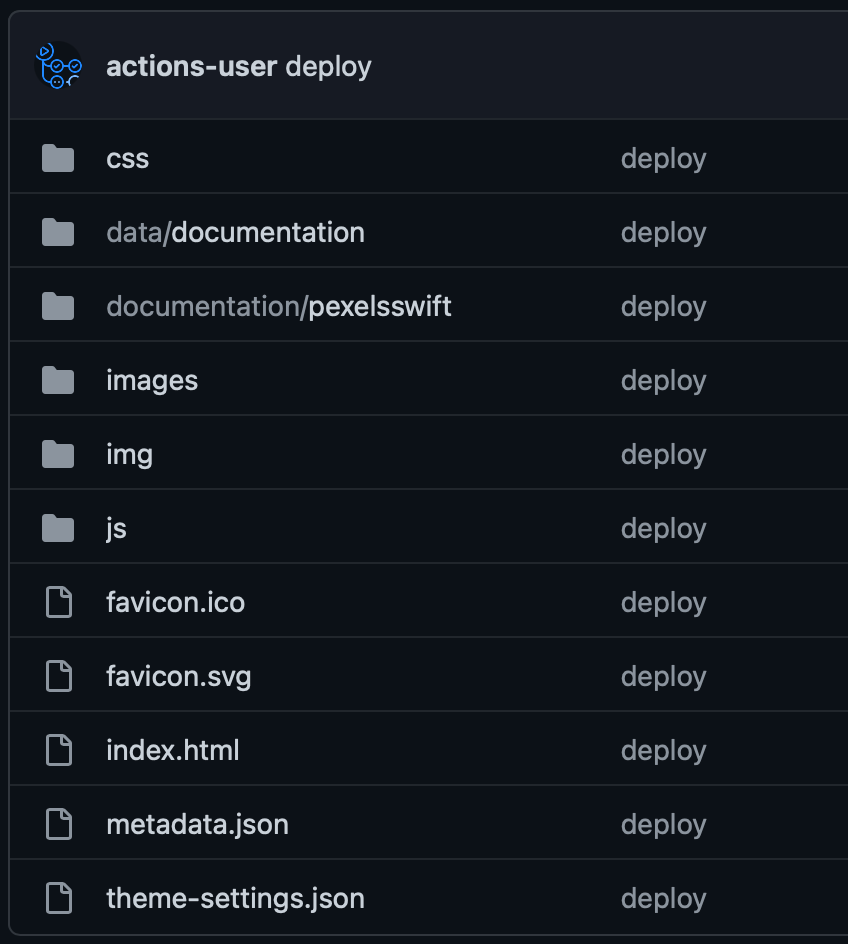
Push the changes to your main branch and you should see the workflow start running. Once it finishes you will see a new branch called docs in your branch list. When checking out the branch you will see something like this:
Now head over to your repository's settings again and open the Pages tab.

- Select your
docsbranch - Select
/ (root)as the folder and clickSave.
Now your documentation should be available via https://USERNAME.github.io/REPO_NAME/documentation/TARGET_NAME.
Note that the URL that automatically appears above the Pages settings will not work and you have to append
documentation/TARGET_NAMEto the path.
As you can see it is pretty easy to setup automatic generation of your documentation and it will update every time changes get pushed to your main branch.
